javascript30 - 19 - Webcam Fun
프로젝트 목표
웹캠의 video stream 을 받아 사진을 찍어 페이지에 나타낸다.
index.html
<!DOCTYPE html>
<html lang="en">
  <head>
    <meta charset="UTF-8" />
    <title>Get User Media Code Along!</title>
    <link rel="stylesheet" href="style.css" />
  </head>
  <body>
    <div class="photobooth">
      <div class="controls">
        <button onClick="takePhoto()">Take Photo</button>
      </div>

      <canvas class="photo"></canvas>
      <video class="player"></video>
      <div class="strip"></div>
    </div>

    <audio class="snap" src="./snap.mp3" hidden></audio>

    <script src="./scripts-FINISHED.js"></script>
  </body>
</html>
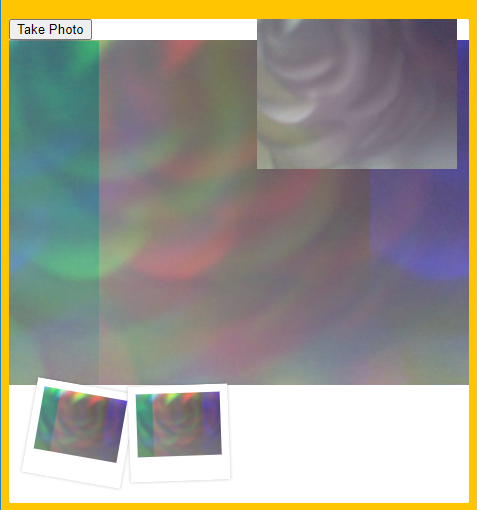
- Take Photo라는 버튼을 누르면 takePhoto() 메소드가 실행된다.
- photo클래스의 canvas에는 웹캠의 비디오가 그려진다.
- player클래스의 video에는 웹캠의 비디오를 띄운다. (위에 작게 떠있는것이 웹캠 비디오)
- strip클래스의 div에는 촬영한 canvas의 사진을 추가한다.
- snap class의 audio 소리파일 이 있으며, 찰칵소리를 내준다. snap.mp3
style.css
.strip {
  padding: 2rem;
}

.strip img {
  width: 100px;
  overflow-x: scroll;
  padding: 0.8rem 0.8rem 2.5rem 0.8rem;
  box-shadow: 0 0 3px rgba(0, 0, 0, 0.2);
  background: white;
}

.strip a:nth-child(5n + 1) img {
  transform: rotate(10deg);
}
.strip a:nth-child(5n + 2) img {
  transform: rotate(-2deg);
}
.strip a:nth-child(5n + 3) img {
  transform: rotate(8deg);
}
.strip a:nth-child(5n + 4) img {
  transform: rotate(-11deg);
}
.strip a:nth-child(5n + 5) img {
  transform: rotate(12deg);
}
-
overflow-x : scroll
가로축(x축) 으로 내용이 넘칠 때 scroll bar가 생기도록 한다.
-
형제사이에서의 순서에 따라 요소를 선택한다.
nth-child(5n+1) 이면 1,6,11,….등의 요소를 나타낸다.
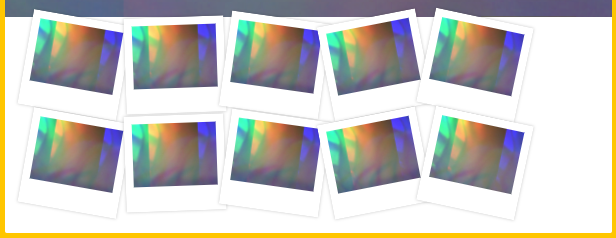
이처럼 5개를 기준으로 사진의 각도를 다르게 하기위해 사용한 것 같다.
script.js 파일 분석
1. 태그에 대응되는 상수들 생성
const video = document.querySelector(".player");
const canvas = document.querySelector(".photo");
const ctx = canvas.getContext("2d");
const strip = document.querySelector(".strip");
const snap = document.querySelector(".snap");
2. 함수 실행, 이벤트 리스너 등록
getVideo();
video.addEventListener("canplay", paintToCanvas);
-
첫번째로 getVideo메소드를 실행하고
-
canplay이벤트에 대해 paintToCnavas메소드가 실행되도록 한다. (canplay : 브라우저가 비디오를 재생 가능할때)
3. getVideo() - 페이지에 웹 비디오를 출력
function getVideo() {
  navigator.mediaDevices
    .getUserMedia({ video: true, audio: false })
    .then((localMediaStream) => {
      console.log(localMediaStream);
      video.srcObject = localMediaStream;
      video.play();
    })
    .catch((err) => {
      console.error(`OH NO!!!`, err);
    });
}
-
navigator.mediaDevices.getUserMedia()
사용자에게 미디어 입력 장치 사용 권한을 요청하며, 사용자가 수락하면 요청한 미디어 종류의 트랙을 포함한
MediaStream을 반환해준다.video는 사용해야 하므로 true, audio는 필요없으므로 false로 설정해준다.
사용자가 권한 요청을 수락하면
Promise을 반환한다. -
반환되는 promise객체를 video.srcObject = localMediaStream;로 설정하고 video를 play한다.
4. paintToCanvas() - 비디오 실행시 캔버스에 화면을 그려준다.
비디오가 재생될 준비가 되면 실행되는 메소드이다.
function paintToCanvas() {
  const width = video.videoWidth;
  const height = video.videoHeight;
  canvas.width = width;
  canvas.height = height;

  return setInterval(() => {
    ctx.drawImage(video, 0, 0, width, height);
    let pixels = ctx.getImageData(0, 0, width, height);
    pixels = rgbSplit(pixels);
    ctx.putImageData(pixels, 0, 0);
  }, 16);
}
- setInterval()을 통해 16ms 마다 캔버스를 그리는 무명함수를 실행한다.
- 무명함수에서는 캔버스에 video를 그려준다.
- 그리고 캔버스의 pixel을 조정한다. rgbSplit()메소드에서 (설명은 생략)
5. takePhoto() - 버튼을 누르면 비디오 캡쳐
버튼을 클릭하면 비디오를 캡쳐해 div부분에 미리보기 스냅샷이 삽입된다.
function takePhoto() {
  // played the sound
  snap.currentTime = 0;
  snap.play();

  // take the data out of the canvas
  const data = canvas.toDataURL("image/jpeg");
  const link = document.createElement("a");
  link.href = data;
  link.setAttribute("download", "handsome");
  link.innerHTML = `<img src="${data}" alt="Handsome Man" />`;
  strip.insertBefore(link, strip.firstChild);
}
-
` snap.currentTime = 0;
와snap.play();` 부분은 ‘찰칵’소리를 내는 부분이다. -
그리고 div태그에 스냅샷을 삽입하는데
캔버스의 데이터를 data에 저장하고 link라는 a태그 요소를 만든다.
link의 주소를 data로 설정하고, download속성을 handsome으로 설정해 다운받으면 handsome이라는 이미지 파일이 다운되게 한다.
link의 html을 data가 주소인 img태그를 만들어 화면에 나타낸다.
그리고 insertBefore()함수를 이용해 strip class 즉 div태그의 첫번쨰 자식으로 넣어준다.
-
insertBefore() : 부모노드의 기준 점 노드 앞에 삽입할 노드를 삽입한다.
문법 :
부모노드.insertBefore(삽입 할 노드, 기준 점 노드)
-
